
欢迎 Fork 我的博客@GitHub。
这阵子我把 hexo 博客新换了一个主题 melody,主要就是为了让博客更加美观、简洁。换好主题之后发现有好多可以继续提升的地方,主要包括图标美化、 SEO 优化、自动构建这三个方面。
美化
无意中看到 melody 开发者 MARKSZ 的一篇文章3,发现了 PWA(Progressive Web Apps) ,melody 已经添加了支持。
根据谷歌官方文档4, Web App Install Banners 的出现要满足 4 个条件:
- manifest 文件
- service worker
- 网站使用 HTTPS
- 网站符合Chrome 定义的其他一些条件(可以忽略)
Manifest
melody 主题与 manifest 相关的源代码位于主题layout/includes/head.pug中:
if (theme.pwa && theme.pwa.enable) |
这段代码会使每个页面的<head>部分都加入 manifest 的声明,只需要在博客/source/_data/melody.yml中设置:
pwa: |
然后将自己生成的 manifest.json 放入博客/source/path/to/manifest.json或者 melody 主题的source/path/to/manifest.json中就行了,我是直接放入了/source下。
生成 manifest.json 推荐到Favicon Generator. For real.,选择一张图片作为自己的 logo 就可以开始制作,接下来可以自定义在各个平台下图标的大小、颜色等属性。
2018.10.19 更新
生成图标还可以到 Website Planet 网页图标生成器,该网站支持多种语言,生成的图标支持多种平台,尺寸。
致谢:名为 Miriam 的网友
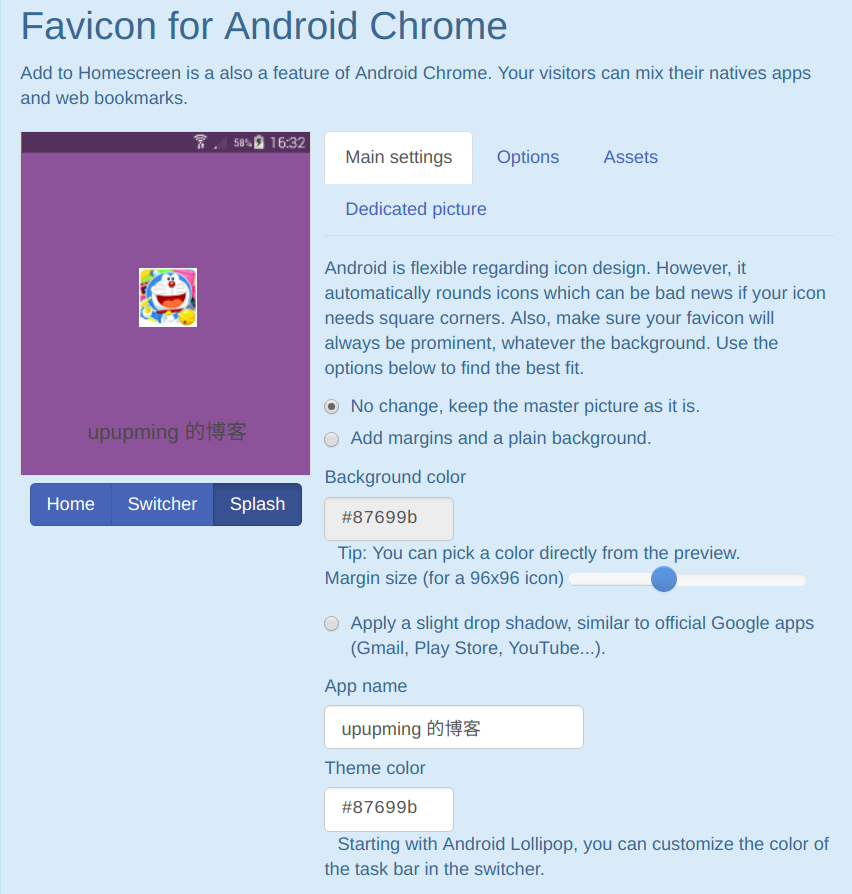
上图是我针对 Android Chrome 的设置,其他的平台也是类似,生成之后将其下载下来,网站上建议做法是将解压后的文件放在网站根目录,并在<head>部分加入这些代码:
<link rel="apple-touch-icon" sizes="180x180" href="/apple-touch-icon.png"> |
文件放在/source或者 melody 的 source目录下均可。插入这段代码则要修改一下 melody 的代码,melody 默认只支持rel="manifest"这一项,这是用来生成 PWA 的,为了使用其他功能,我把layout/includes/head.pug修改了一下:
if (theme.favicon_package && theme.favicon_package.enable) |
并在 molody.yml 中配置这些路径,我把下载下来的site.webmanifest顺便改名成了manifest.json。
favicon_package: |
Service worker
melody 推荐的是使用 hexo-offline 插件生成 service worker 来支持离线浏览我们的静态博客,安装非常简单。
$ npm i hexo-offline --save |
然后hexo clean && hexo generate; hexo d更新博客。
测试
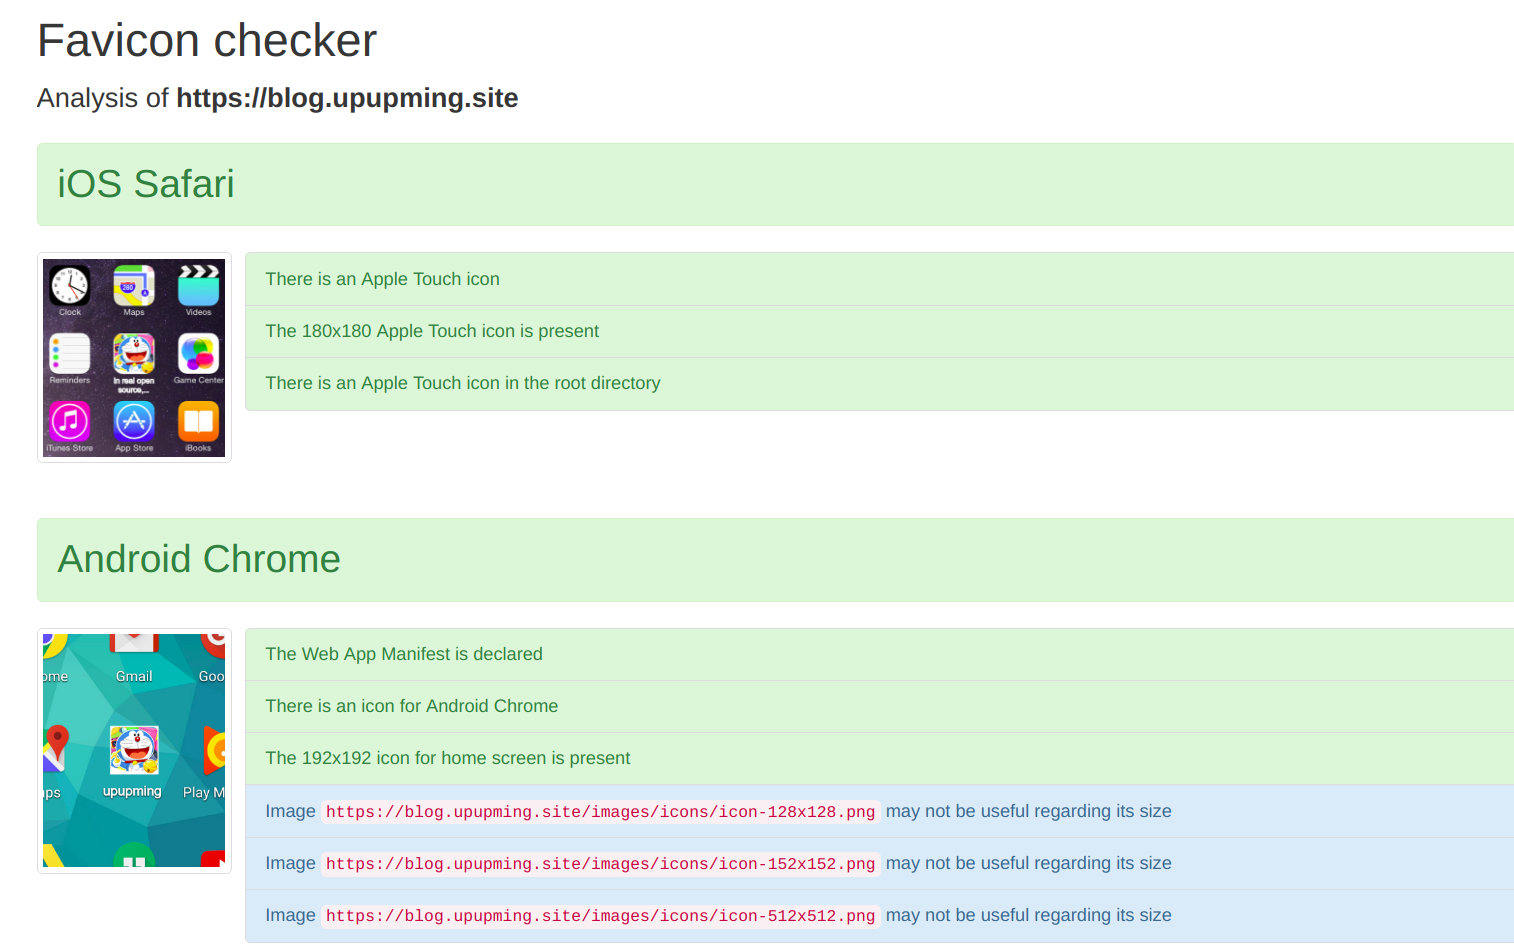
首先到Favicon checker,测试一下前面的配置是否成功。
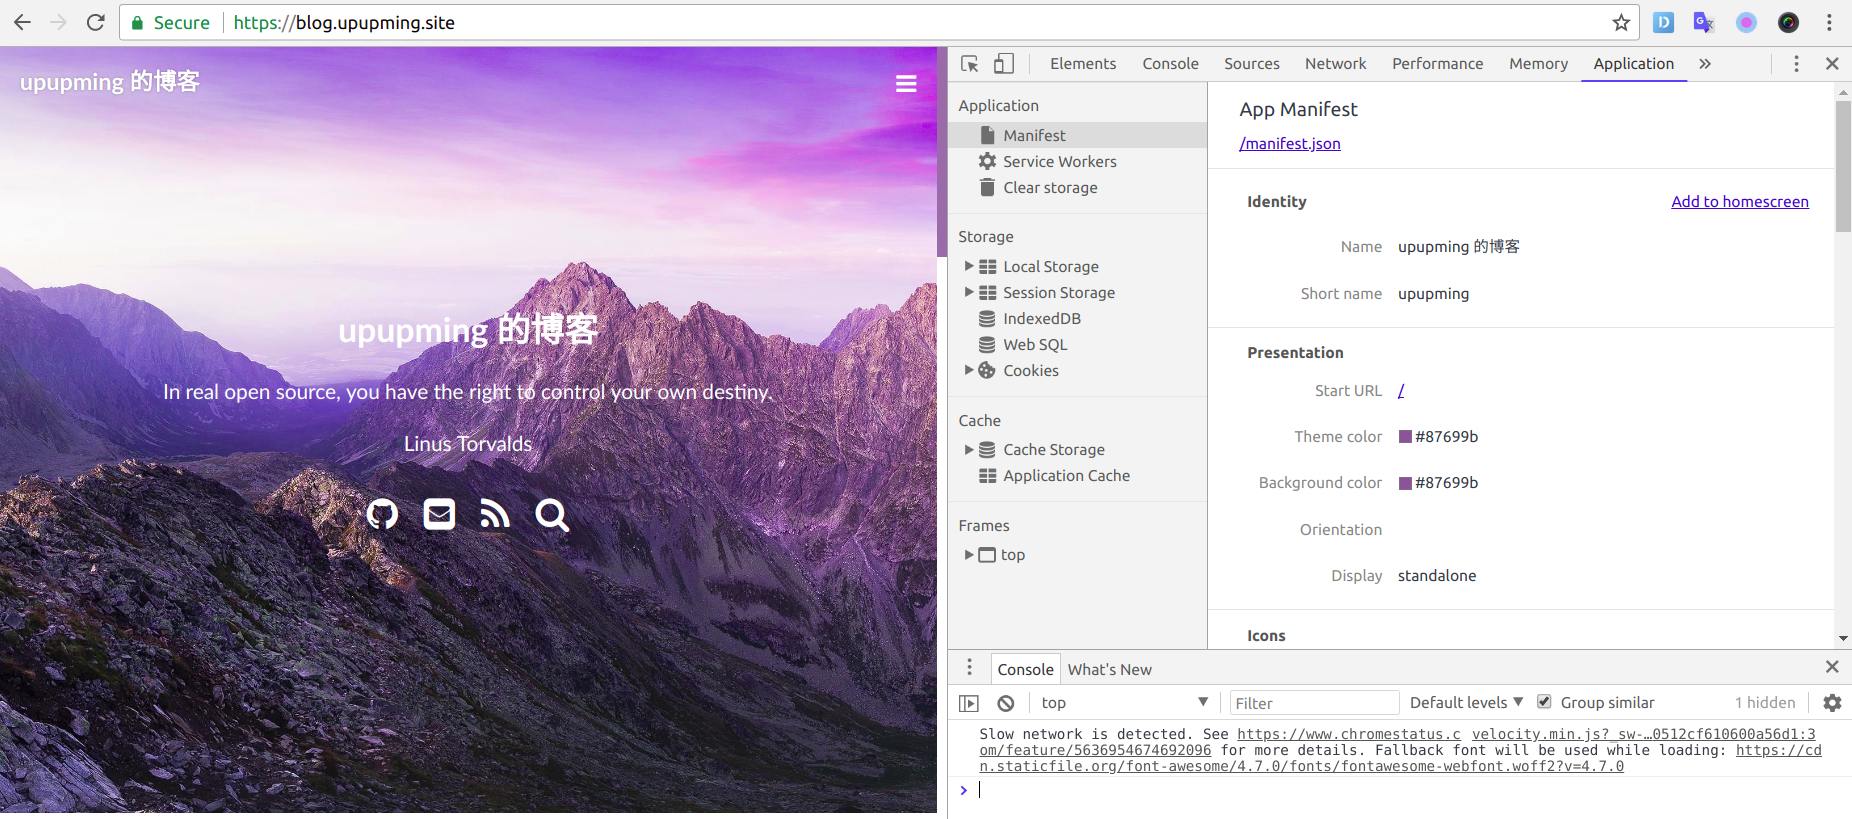
在电脑 Chrome 上按F12,进入开发者模式,选择Applications,点击Add to homescreen
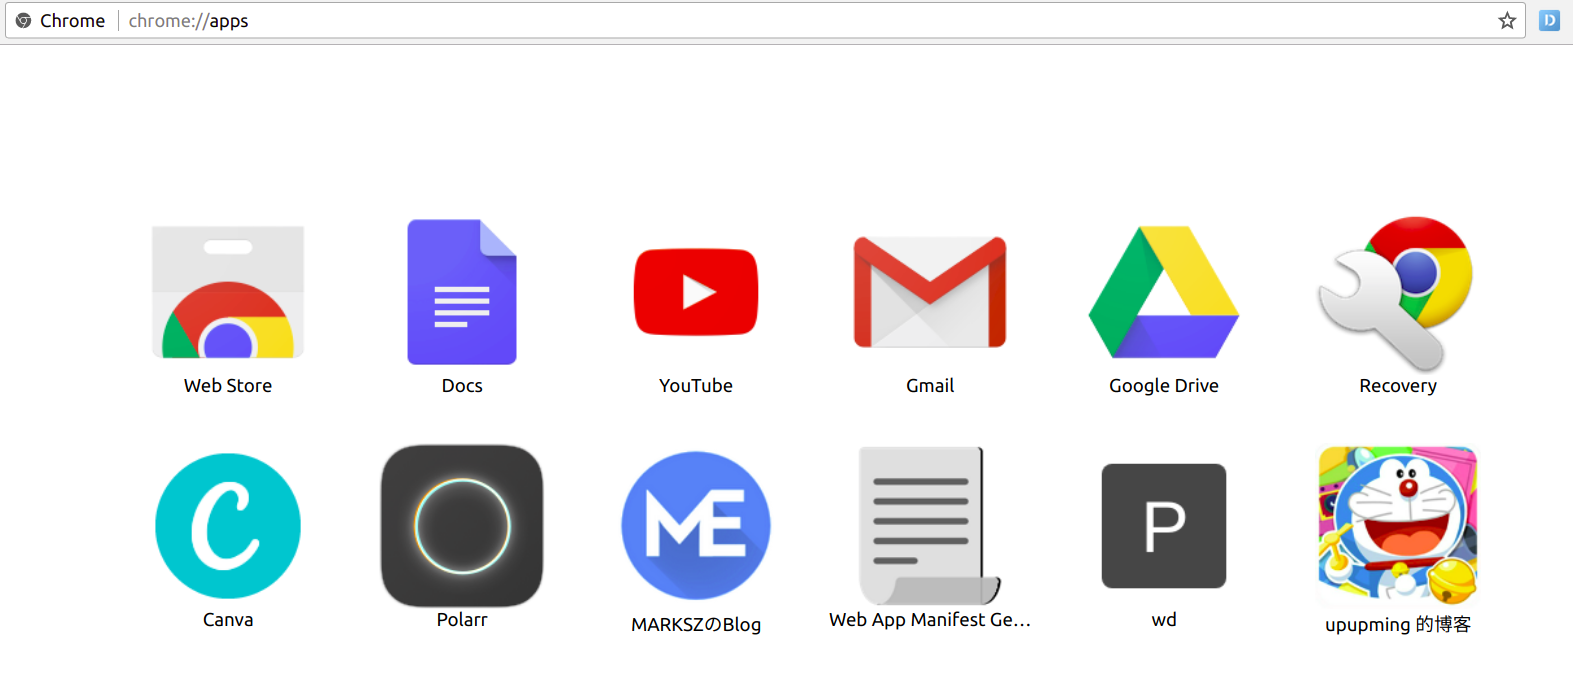
然后在 chrome 地址栏输入chrome://apps就可以看到自己的 PWA 啦。
接下来测试一下安卓 Chrome,进入自己博客可以发现地址栏非常漂亮啊,点击ADD TO HOME SCREEN更是可以生成 PWA ,打开 PWA 时界面也挺好,跟微信小程序特别像。
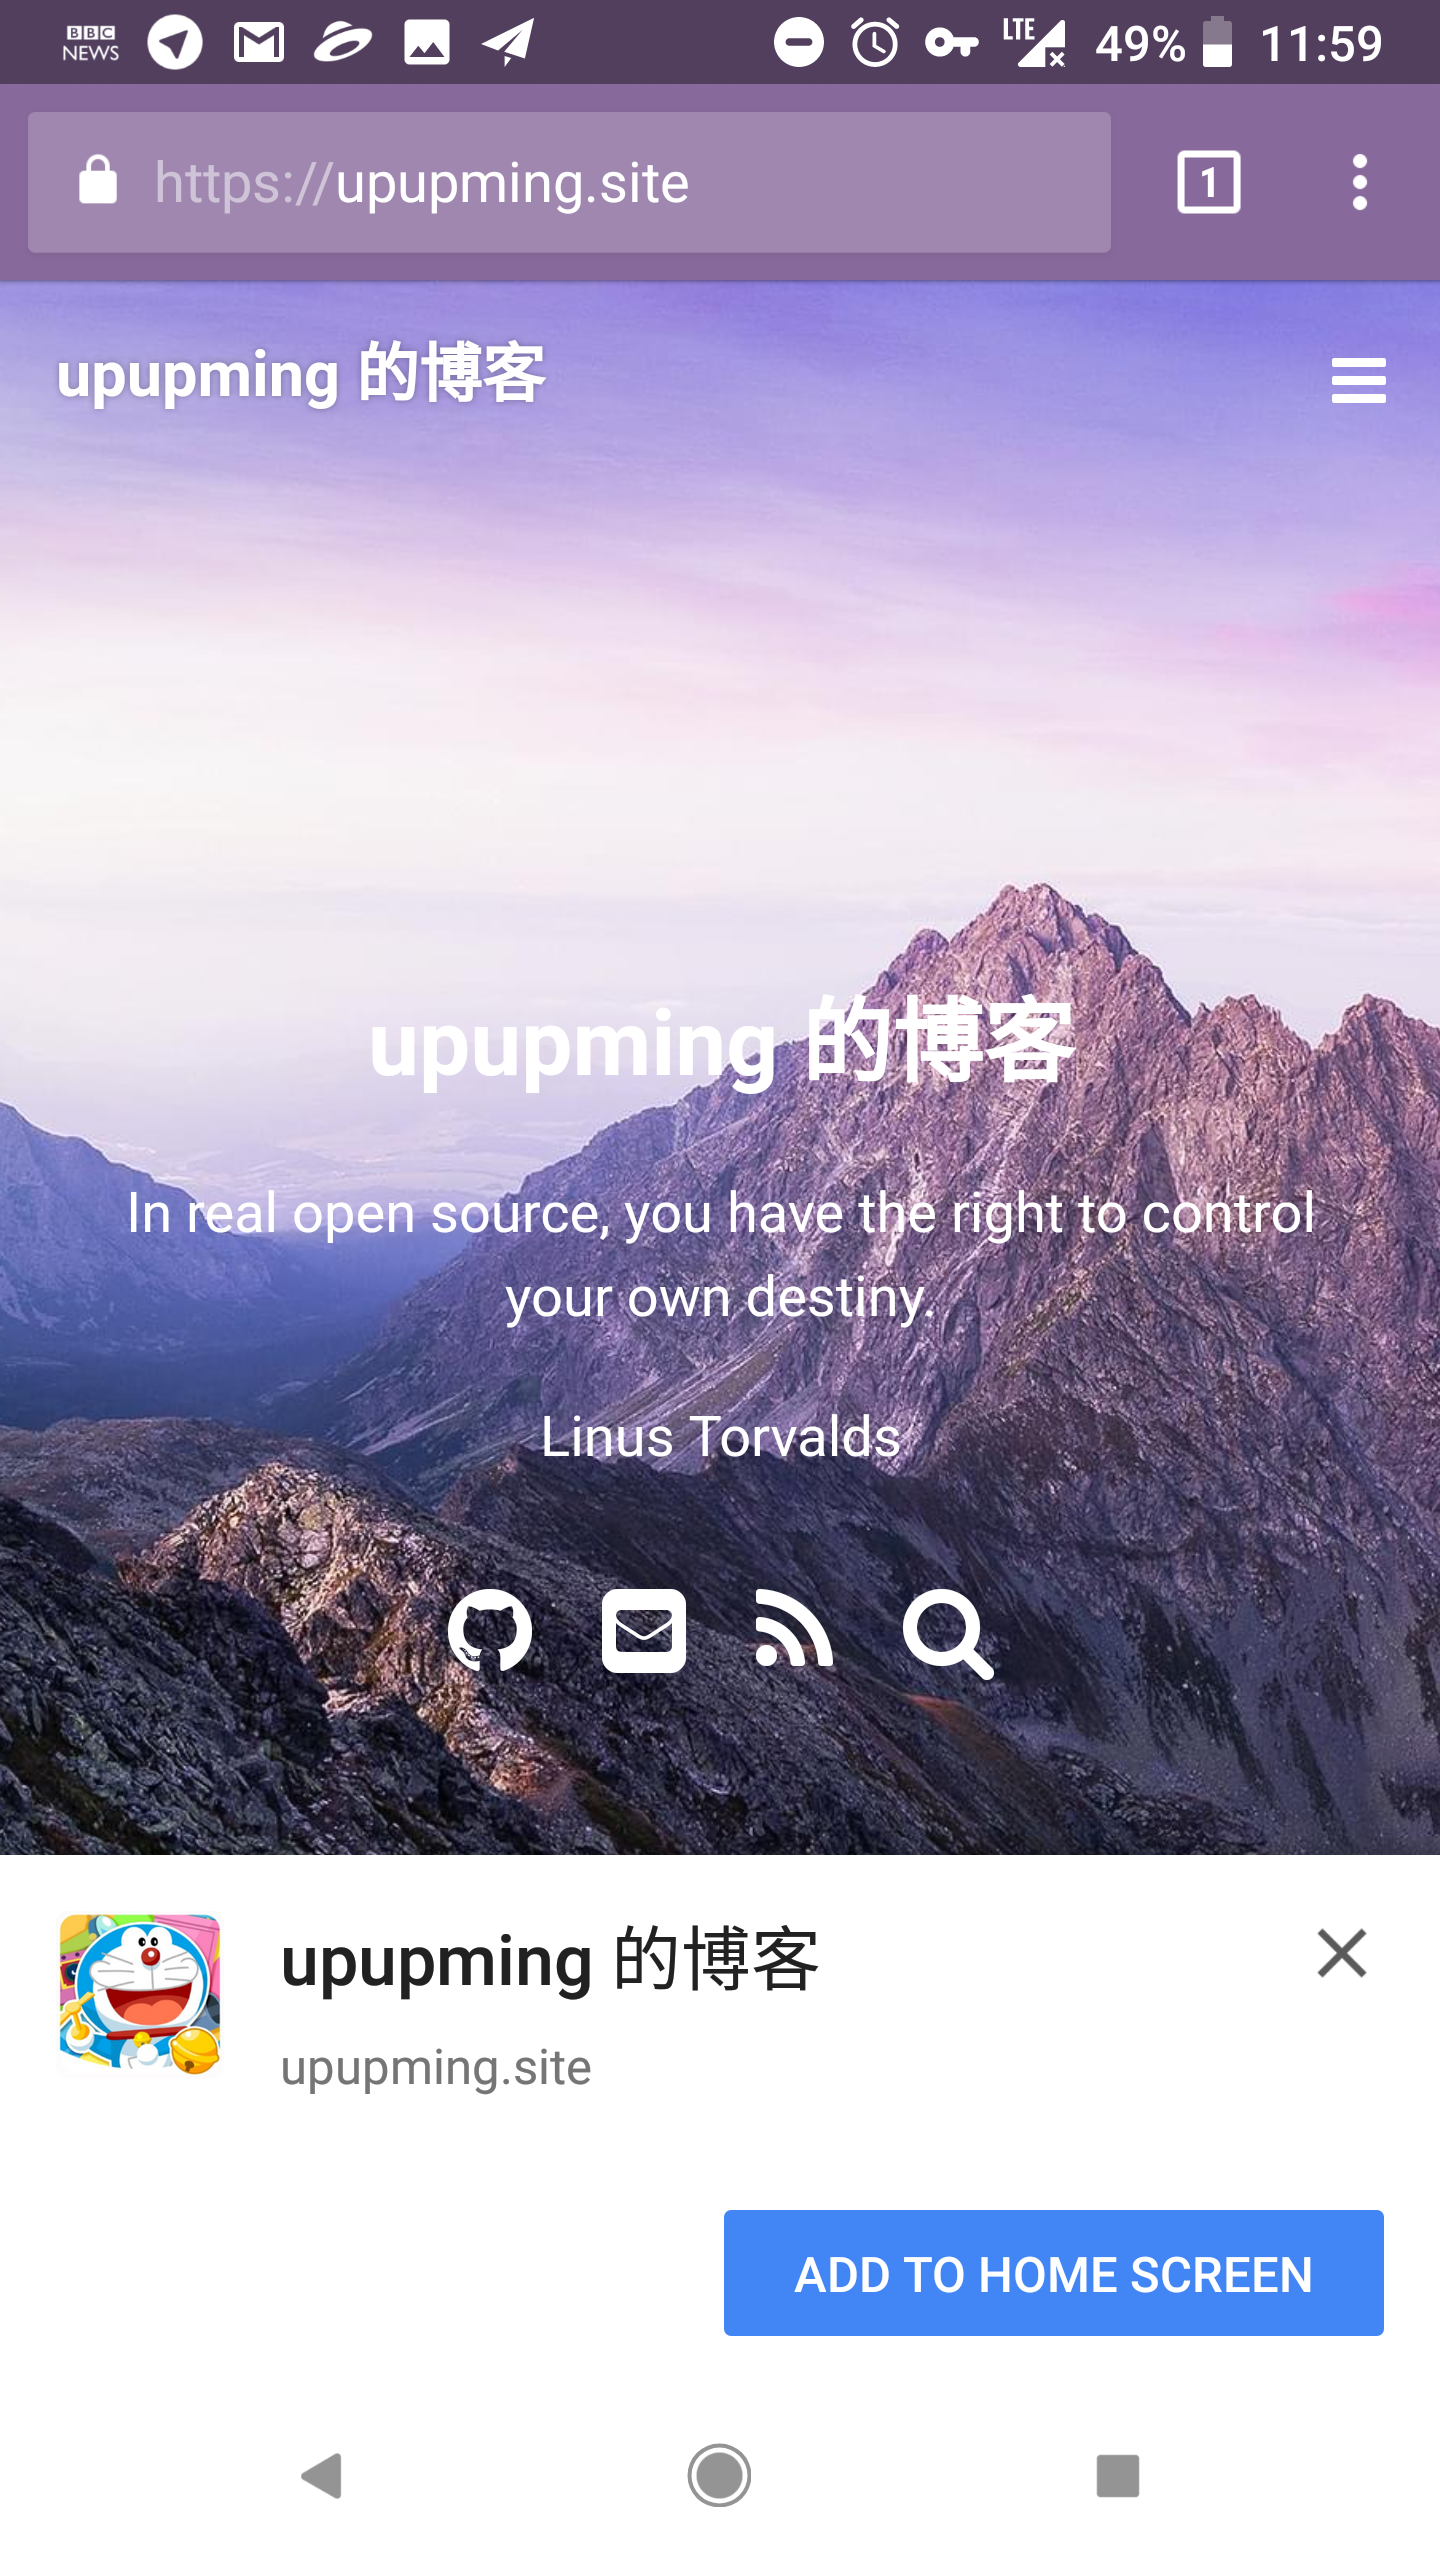 |
 |
|---|---|
SEO 优化
SEO(Search Engine Optimization) 优化主要就是让谷歌、百度及时抓取博客内容,让我们的博客更容易被别人找到。
先安装一下hexo-generator-sitemap。
$ npm install hexo-generator-sitemap --save |
# Sitemap |
谷歌搜索site:yourblog.com,博客没有被收录的时候只能看到一项 Try Google Search Console,点进去之后点击红色的ADD A PROPERTY添加自己的博客,接下来需要验证,可以选择下载 html 文件并放入到站点根目录进行验证。
验证好后提交一下自己网站的 sitemap ,比如上面的设置的话就是生成的yourblog.com/sitemap.xml,提交好后只需几个小时,谷歌就会抓取你的网页啦。
百度
根据历史资料9,2015年3月26日,托管在 Github pages 上的 GreatFire 和纽约时报镜像曾遭来自百度的 DDoS(distributed denial-of-service) 攻击,原因是中国内网和互联网边界的某个设备劫持了进入中国的 HTTP 连接,将一些来自百度的 JavaScript 文件替换为恶意文件,但是百度否认自身存在安全隐患,也否认参与攻击。
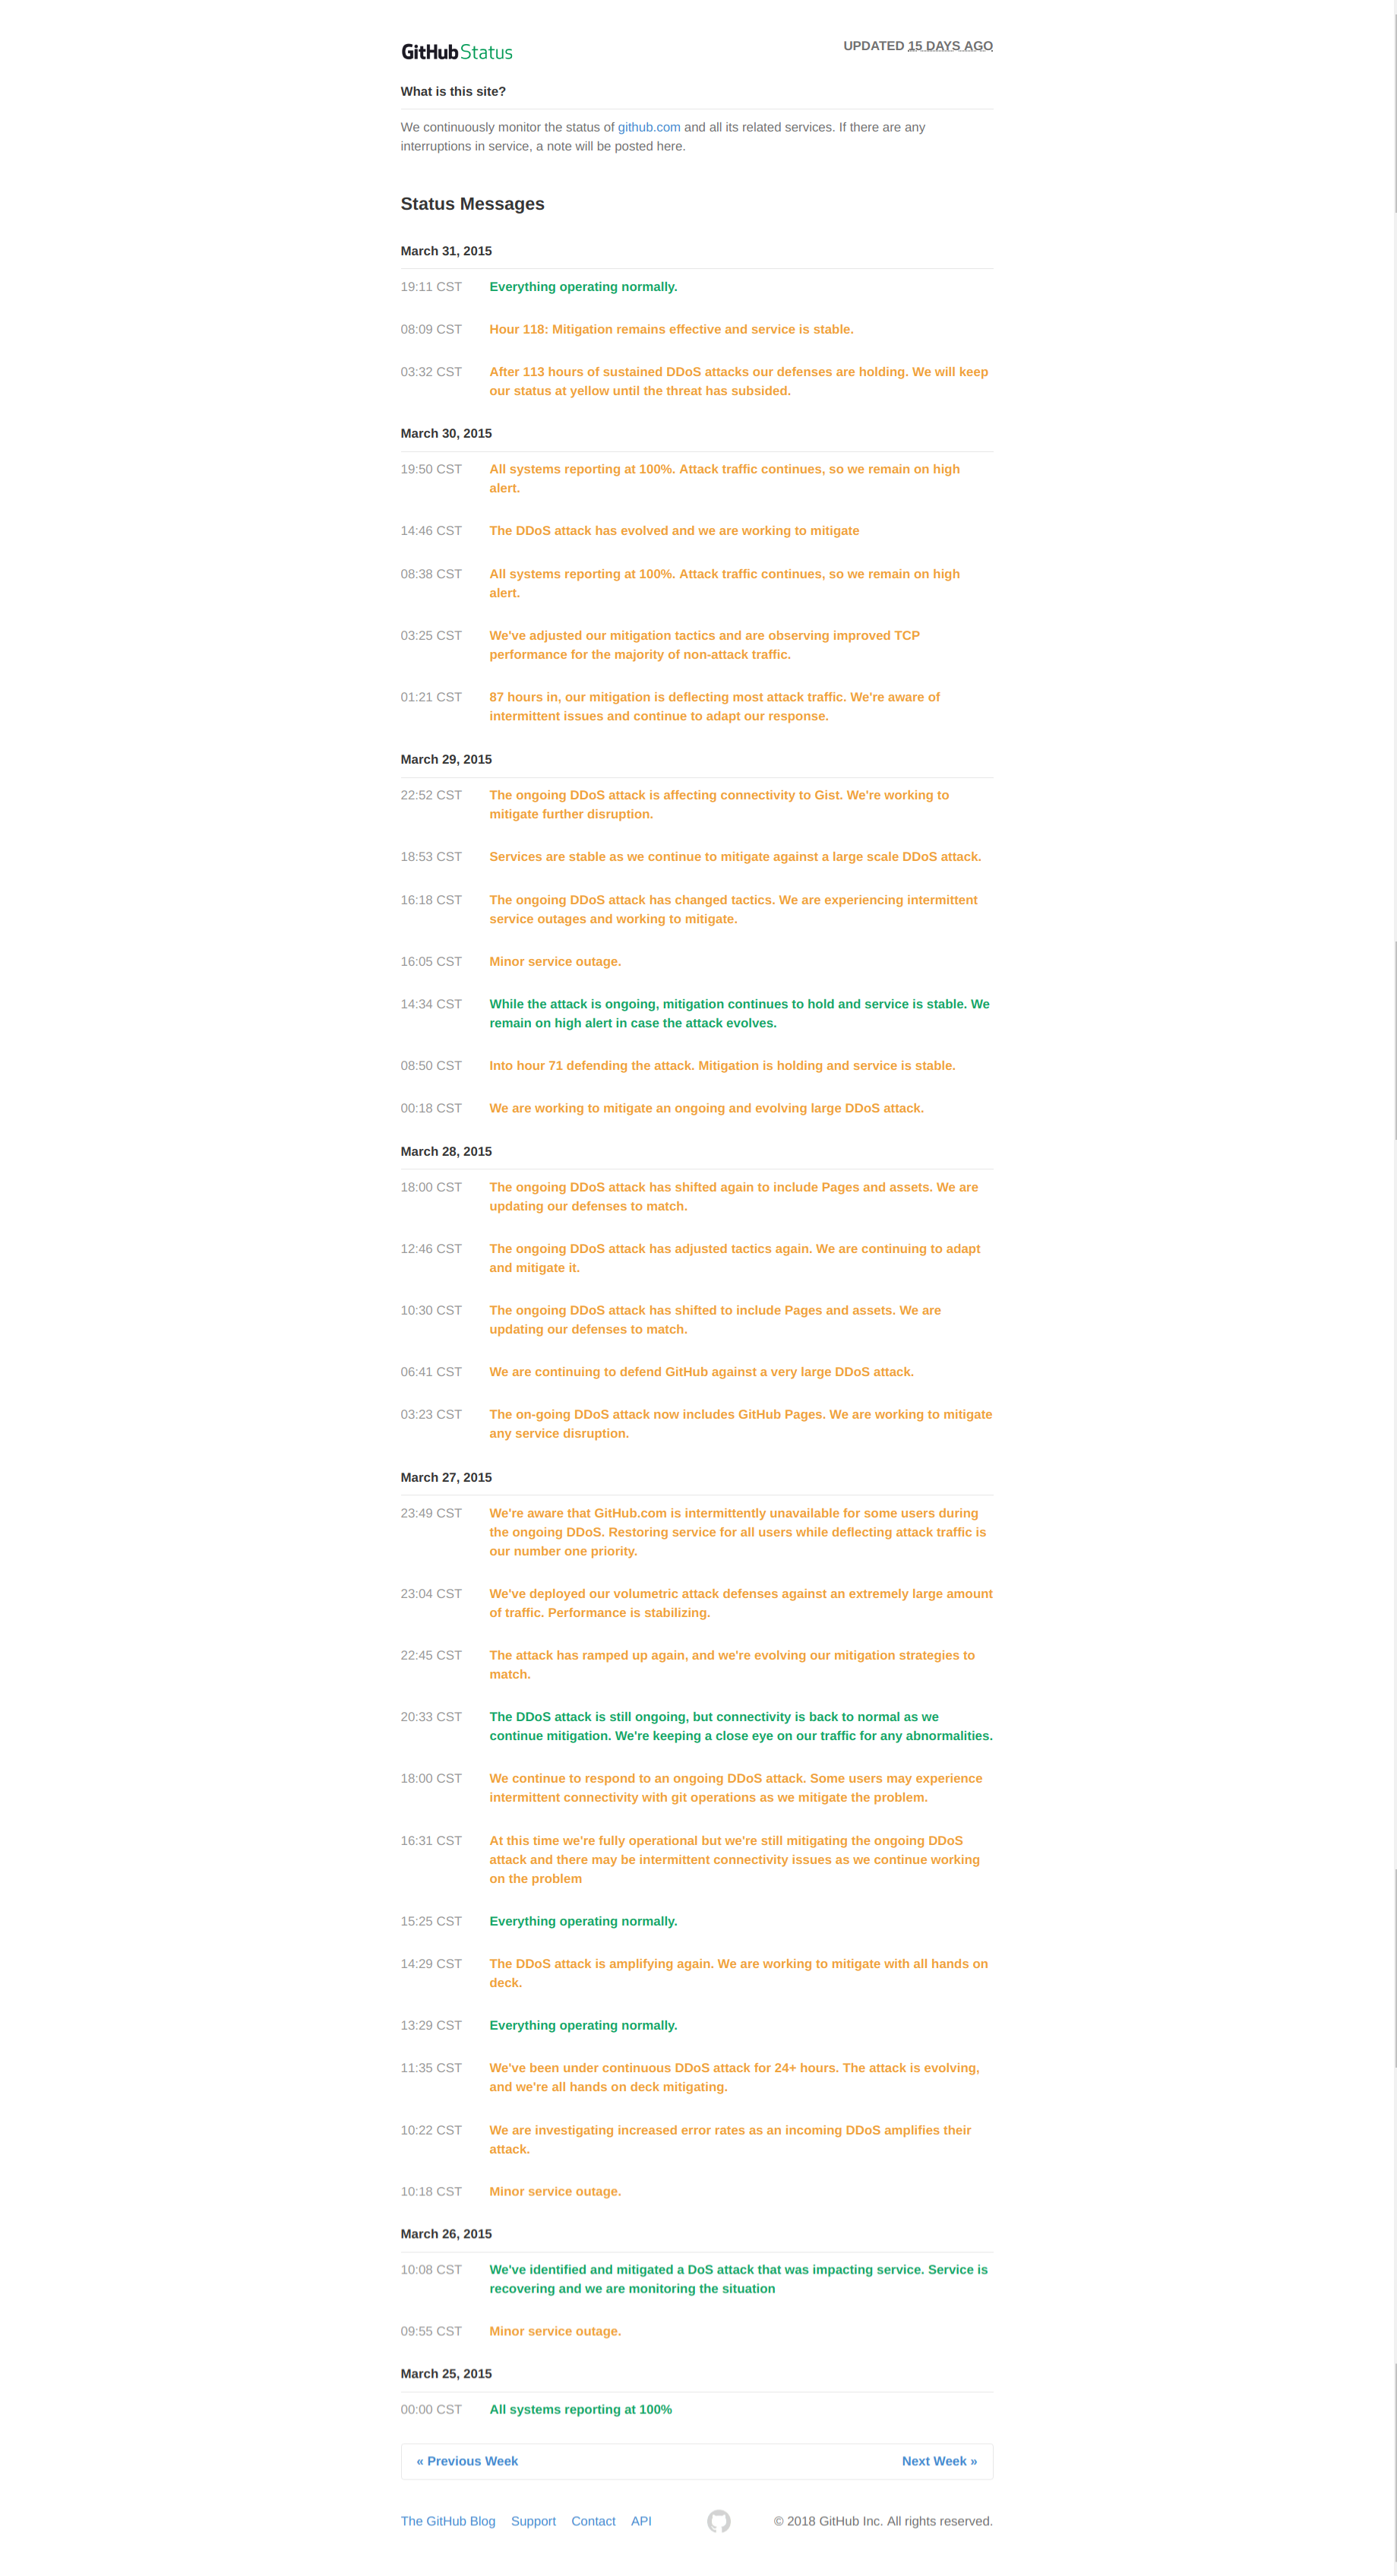
从这张图片可以看出当时状况多么糟,github 只有选择屏蔽百度来解决这个问题,而且这个屏蔽措施至今都没有解除(官方说可能会一直持续)。这也为我们博客被百度抓取提供了障碍(不过确实可以锻炼我们的能力哈)。
从我初步查询的资料看来,解决方法有以下几种:
-
用 Coding、gitlab 等托管一份博客备份,使用 DNSPOD 根据用户 IP 进行流量分发。
由于在性能方面,还是更倾向于 Cloudflare 的 DNS 解析服务,不使用这种方案。
-
使用 CDN 加速服务,缓存站点信息,这样百度就可以正常抓取来自 CDN 的信息。
看了一下国内的 CDN 服务,比如知道创宇、又拍云,都需要实名验证、域名备案,感觉特别麻烦,毕竟不是大型网站。经测试 Cloudflare 的 caching 功能也不能解决这个问题。
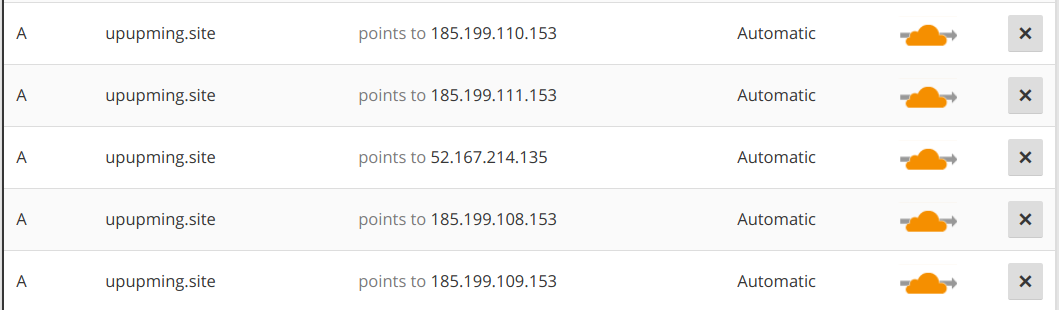
最终还是选择在 gitlab 上托管一份博客备份,使用多个 A 记录,根据 cloudflare 的官方文档,这样用户访问网站时,解析到每个 IP 的可能性是均等的,那么百度爬取的时候,理论上成功率为 50% ( DNS 解析到 gitlab)。
A DNS server with round-robin enabled will have multiple different A records, each with the same domain name but a different IP address. Each time the DNS server is queried, it sends the IP address to which it most recently responded with to the back of the queue, operating on a loop. The IP addresses in a round-robin DNS server are like baseball players in a batting lineup: each one gets a turn and then is moved to the back of the line.
我选择了 gitlab 来托管网站,跟 github 类似,创建一个username.gitlab.io仓库,根据官方文档,在 Settings -> Pages 中添加域名blog.upupming.site,需要通过 TXT 认证域名所有权,在 cloudflare 设置 gitlab 给出的 TXT 就可以验证成功;然后将自己的域名解析到 gitlab 给出的 IP 52.167.214.135。每次更新博客要同时将自己的仓库 push 到两个仓库还是挺麻烦的,但是gitlab 有自己的持续集成系统 GitLab CI,只需要在根目录新建.gitlab-ci.yml,加入构建指令即可自动构建。我将在下一部分详细讲解。

**2018.06.05 更新**
为了安全,还要给自定义域名加入 https。GitHub 从 5 月份开始支持自定义域名自动加入 https,可以参考这篇博文。GitLab 的配置方法需要获取并上传 SSL 证书,可以参见这篇文章,即将根域名添加 A 记录到 gitlab 的 IP,blog 二级域名添加 CNAME 到 upupming.gitlab.io,再上传 Cloudflare 生成的证书。
百度提供了主动提交功能,hexo 博客可安装插件Hexo Baidu URL Submit来主动提交链接。
npm install hexo-baidu-url-submit --save |
在_config.yml加入:
baidu_url_submit: |
另外还可以用hexo-generator-baidu-sitemap生成一下站点地图。
npm install hexo-generator-baidu-sitemap@0.1.1 --save |
在_config.yml加入:
baidusitemap: |
Travis CI 自动化持续集成构建
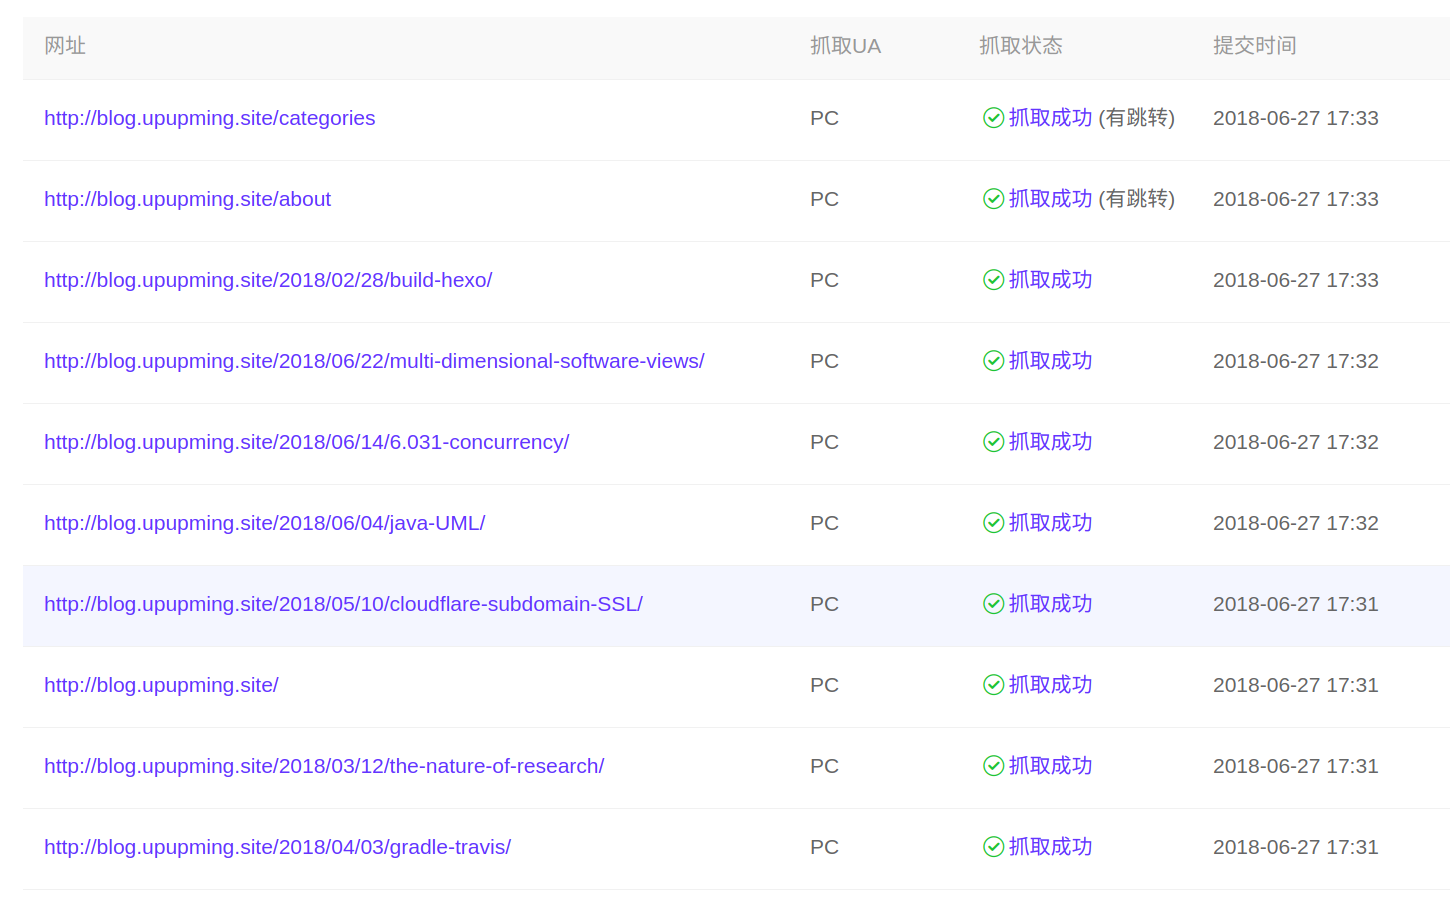
**2018.06.27 更新** 为了提高成功率,我把 blog 只指向 GitLab 仓库,现在成功率算是提到 100% 了。
现在的状态是这样:
-
托管在 GitHub 仓库 https://github.com/upupming/upupming.github.io 上,包含源代码。
-
托管在 GitLab 仓库 https://gitlab.com/upupming/upupming.gitlab.io 上。我是把
blog指向 GitHub 的 A 记录给删除了,转而使用 CNAME 单独解析到 GitLab 仓库,这样就不会解析到 GitHub 了。

现在同时有 github、gitlab 两个仓库需要管理,每次 push 比较麻烦,使用 Travis CI 可以解决这个问题。
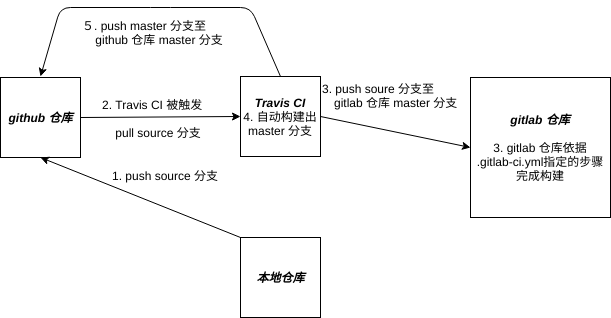
这幅图就是整体上的思路,平时更新博客后只需 push source 分支到 github 仓库,就能完成所有的更新。gitlab 仓库必须要在 Settings > Repository > Protected Branches 中删除 master 分支保护,否则后续无法 push ,还要在 Settings > CI / CD > Runners Settings 中 Enable shared runners,否则无法触发自动构建。
首先得执行git checkout -b sorce新建 source 分支,后续在本地只需要操作 source 分支。写好 Travis CI 指令.travis.yml:
language: node_js # 声明环境为node |
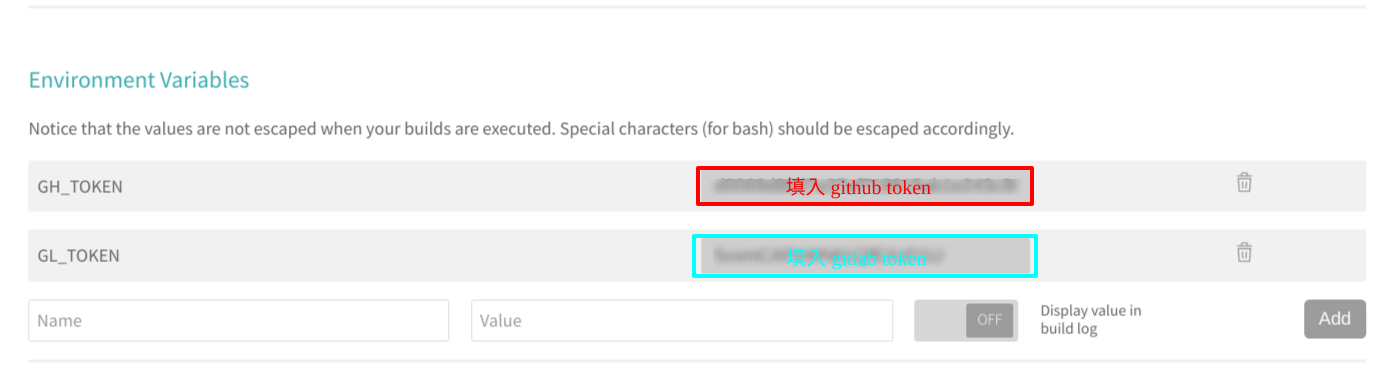
这里的 GL_TOKEN、GH_TOKEN 是 gitlab、github 的授权秘钥,它们的申请方法差不多。
登录 https://gitlab.com/profile/personal_access_tokens ,勾选 api,生成一个 Personal Access Token,将其复制下来存好。
登录 https://github.com/settings/tokens ,照样生成一个有对仓库进行写权限的 token ,将其复制下来存好。
登录 https://travis-ci.org/ ,打开仓库构建开关,在 Setting 中将两个 token 加入全局环境变量中。
gitlab pages 构建方式不同于 github pages,必须依靠.gitlab-ci.yml文件告诉 gitlab 如何生成网站资源,只需直接 push 源代码即可。写一下 gitlab 要用到的 .gitlab-ci.yml文件14。
# gitlab 部署方式不同于 github ,必须要靠 |
然后提交一个 commit,执行git push,就会自动构建了。
**2018.06.22 更新**
这里附上我的一个 Linux 下的小脚本 deploy.sh,更加方便部署。
|
先使用 chmod +x deploy.sh 加上可执行权限,然后每次直接 ./deploy.sh -m "your commit message here" 就可以更新博客源代码至 GitHub 了。
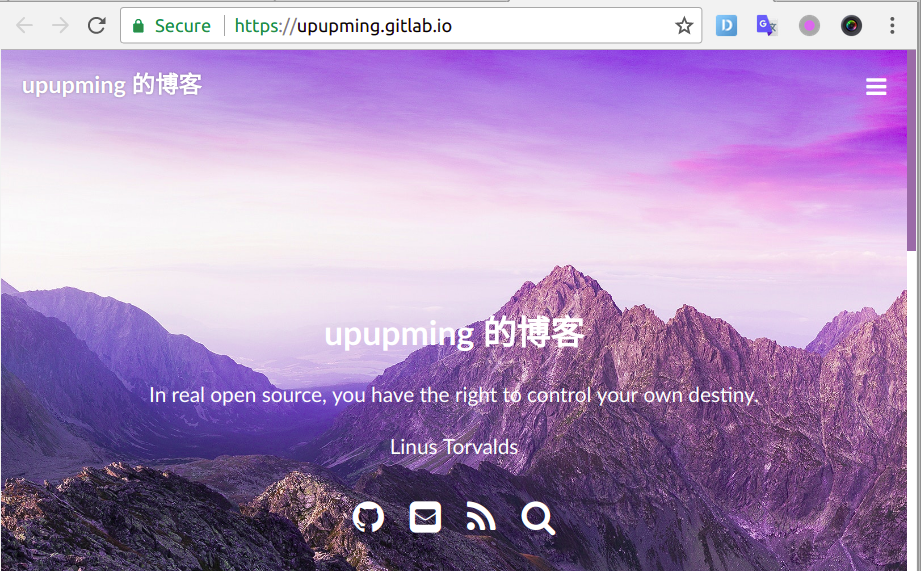
gitlab 构建成功。
最后放上博客部署的全过程。
-
本地 push 至 github
Counting objects: 41, done.
Delta compression using up to 4 threads.
Compressing objects: 100% (41/41), done.
Writing objects: 100% (41/41), 903.68 KiB | 8.77 MiB/s, done.
Total 41 (delta 29), reused 0 (delta 0)
remote: Resolving deltas: 100% (29/29), completed with 7 local objects.
To github.com:upupming/upupming.github.io.git
07143ba..4b722ef source -> source -
Travis CI push 至 gitlab,构建后 push 至 github
...
The command "git config user.email "upupming@gmail.com"" exited with 0.
$ git config http.postBuffer 524288000
The command "git config http.postBuffer 524288000" exited with 0.
$ git push --force --quiet "https://gitlab-ci-token:*****************@gitlab.com/upupming/upupming.gitlab.io.git" source:master
...
The command "hexo clean" exited with 0.
The command "hexo algolia" exited with 0.
$ sed -i'' "s~git@github.com:upupming/upupming.github.io~https://${GH_TOKEN}@github.com/upupming/upupming.github.io~" _config.yml
$ hexo d
...
To https://github.com/upupming/upupming.github.io.git
 + 383f0f3...0f589eb HEAD -> master (forced update)
Branch 'master' set up to track remote branch 'master' from 'https://*****************************@github.com/upupming/upupming.github.io.git'.
INFO  Deploy done: git
INFO  Deploying: baidu_url_submitter
INFO  Submitting urls
https://blog.upupming.site/2018/04/03/gradle-travis/
https://blog.upupming.site/2018/03/26/java-equals-type-safety/
https://blog.upupming.site/2018/03/12/the-nature-of-research/
https://blog.upupming.site/2018/03/05/blurring-disciplinary-boundaries/
https://blog.upupming.site/2018/02/28/build-hexo/ -
gitlab 收到 push 后自动构建
Creating cache project...
node_modules: found 16309 matching files
Uploading cache.zip to http://runners-cache-5-internal.gitlab.com:444/runner/project/6003762/project
Created cache
Uploading artifacts...
public: found 153 matching files
Uploading artifacts to coordinator... ok            id=61830841 responseStatus=201 Created token=6Ps9JcT6
Job succeeded
参考资料
- GitHub - Molunerfinn/hexo-theme-melody: A simple & beautiful & fast theme for Hexo.
- Do what you love,Love what you do | MARKSZのBlog
- 用新版的Chrome把PWA网站添加到桌面,获得媲美原生应用的体验 | MARKSZのBlog
- Web App Install Banners | Web Fundamentals | Google Developers
- The Web App Manifest | Web Fundamentals | Google Developers
- Service Workers: an Introduction | Web Fundamentals | Google Developers
- Favicon Generator for all platforms: iOS, Android, PC/Mac…
- GitHub - JLHwung/hexo-offline: Out-of-the-box hexo offline experience
- Last night, GitHub was hit with massive denial-of-service attack from China - The Verge
- Round-Robin DNS | Cloudflare
- GitLab Pages | GitLab
- GitHub - huiwang/hexo-baidu-url-submit: 主动推送Hexo博客新链接至百度搜索引擎,解决百度爬虫被禁止访问的问题,提升网站收录质量和速度。
- GitHub - coneycode/hexo-generator-baidu-sitemap: Baidu Sitemap generator plugin for Hexo
- Hosting on GitLab.com with GitLab Pages | GitLab