
本文主要介绍了 Gradle 的使用,同时对相应的用于持续集成构建的 travis.yml 文件配置进行解读。
Gradle
安装
进入 Release1 界面下载 Gradle ,解压到新创建的/opt/gradle下:
$ sudo mkdir /opt/gradle |
设置环境变量:
# 暂时设置 |
查看 Gradle 版本:
$ gradle -v |
前面五行 warning 是因为最新的 java 9 为了更好地实现隐藏,后续将限制对java.lang.Object.finalize()的访问,而 Gradle 自带的 Groovy 库中的org.codehaus.groovy.reflection.CachedClass试图访问这个方法。2 3 4 5
由于问题出在 Groovy 上,Gradle 无法去修复,只好直接镇压这个警告。
$ sudo vi /opt/gradle/gradle-4.6/bin/gradle |
- With
--add-exportsthe package is exported, meaning all public types and members therein are accessible at compile and run time. - With
--add-opensthe package is opened, meaning all types and members (not only public ones!) therein are accessible at run time.4 - When setting
$readingmoduleto ALL-UNNAMED, all code from the class path can access that package.3
创建 Gradle Builds6 7 8
在项目根目录下,使用init命令初始化。
$ gradle init |
vi gradle/wrapper/gradle-wrapper.properties |
gradle 默认的 java 源文件目录是 src/main/java,比如这样的目录结构:
$ tree |
在build.gradle中加入 apply plugin: 'java',进行 build 结果如下:
$ gradle build |
而我当前项目的目录结构与上面完全不同。
$ tree -L 2 |
build.gradle中可以设置许多属性,包括修改源文件目录,运行build properties可以查看所有属性。在官方文档中查到有这两个属性:
-
SourceSet
public interface SourceSet
ASourceSetrepresents a logical group of Java source and resources.
See the example below howSourceSet‘main’ is accessed and how theSourceDirectorySet‘java’ is configured to exclude some package from compilation.apply plugin: 'java'
sourceSets {
main {
java {
exclude 'some/unwanted/package/**'
}
}
} -
SourceDirectorySet
public interfaceSourceDirectorySet
extendsFileTree,PatternFilterable,Named,Describable
ASourceDirectorySetrepresents a set of source files composed from a set of source directories, along with associated include and exclude patterns.SourceDirectorySetextendsFileTree. The contents of the file tree represent the source files of this set, arranged in a hierarchy. The file tree is live and reflects changes to the source directories and their contents.
根据官方文档的说明9,修改build.gradle中 java 源文件目录。
apply plugin: 'java' |
这样就可以成功 build 了。
build 输出(点击展开/折叠)
$ gradle build

BUILD SUCCESSFUL in 0s
2 actionable tasks: 2 up-to-date
$ jar tvf build/libs/Lab2-1160300625.jar
     0 Tue Apr 03 12:41:58 CST 2018 META-INF/
    25 Tue Apr 03 10:33:56 CST 2018 META-INF/MANIFEST.MF
     0 Tue Apr 03 12:41:58 CST 2018 P1/
     0 Tue Apr 03 12:41:58 CST 2018 P1/graph/
  4629 Tue Apr 03 12:41:58 CST 2018 P1/graph/ConcreteEdgesGraph.class
  5161 Tue Apr 03 12:41:58 CST 2018 P1/graph/ConcreteVerticesGraph.class
  1644 Tue Apr 03 12:41:58 CST 2018 P1/graph/Edge.class
   744 Tue Apr 03 12:41:58 CST 2018 P1/graph/Graph.class
  2479 Tue Apr 03 12:41:58 CST 2018 P1/graph/Vertex.class
     0 Tue Apr 03 12:41:58 CST 2018 P1/poet/
  2982 Tue Apr 03 12:41:58 CST 2018 P1/poet/GraphPoet.class
  1364 Tue Apr 03 12:41:58 CST 2018 P1/poet/Main.class
     0 Tue Apr 03 12:41:58 CST 2018 P2/
  2696 Tue Apr 03 12:41:58 CST 2018 P2/FriendshipGraph.class
   997 Tue Apr 03 12:41:58 CST 2018 P2/Person$Color.class
   555 Tue Apr 03 12:41:58 CST 2018 P2/Person.class
     0 Tue Apr 03 12:41:58 CST 2018 P3/
   715 Tue Apr 03 12:41:58 CST 2018 P3/BusSegment.class
  3180 Tue Apr 03 12:41:58 CST 2018 P3/Itinerary.class
  3908 Tue Apr 03 12:41:58 CST 2018 P3/RoutePlanner.class
   179 Tue Apr 03 12:41:58 CST 2018 P3/RoutePlannerBuilder.class
  4096 Tue Apr 03 12:41:58 CST 2018 P3/RoutePlannerBuilderImplementation.class
  1157 Tue Apr 03 12:41:58 CST 2018 P3/RoutePlannerImplementation$Color.class
  3623 Tue Apr 03 12:41:58 CST 2018 P3/RoutePlannerImplementation.class
   317 Tue Apr 03 12:41:58 CST 2018 P3/Stop.class
  2840 Tue Apr 03 12:41:58 CST 2018 P3/StopTime.class
   192 Tue Apr 03 12:41:58 CST 2018 P3/TripSegment.class
   654 Tue Apr 03 12:41:58 CST 2018 P3/WaitSegment.class
在 build.gradle 中加入apply plugin: 'application',可以运行 java 程序。
apply plugin: 'application' |
$ gradle run |
接下来会根据用户输入一直运行下去,直到程序返回 0 退出。
Build 之后
最终的`build.gradle`(点击展开/折叠)
/*
* This file was generated by the Gradle 'init' task.
*
* This is a general purpose Gradle build.
* Learn how to create Gradle builds at https://guides.gradle.org/creating-new-gradle-builds/
*/
apply plugin: 'java'
/* for runnig interaction
apply plugin: 'application'
mainClassName = 'P3.RoutePlanner'
run {
    // 使用标准输入
    standardInput = System.in
}
*/
// Customization of MANIFEST
sourceCompatibility = 1.8
version = '1.0'
// Dependencies
repositories {
mavenCentral()
}
dependencies {
testCompile group: 'junit', name: 'junit', version: '4.+'
// or "testCompile "junit:junit:4.+"
}
sourceSets {
main {
java {
srcDirs = ['src']
}
}
test {
java {
srcDirs = ['test']
}
}
}
build 文件夹目录结构(点击展开/折叠)
$ tree build
build
├── classes
│   └── java
│       ├── main
│       │   ├── P1
│       │   │   ├── graph
│       │   │   │   ├── ConcreteEdgesGraph.class
│       │   │   │   ├── ConcreteVerticesGraph.class
│       │   │   │   ├── Edge.class
│       │   │   │   ├── Graph.class
│       │   │   │   └── Vertex.class
│       │   │   └── poet
│       │   │       ├── GraphPoet.class
│       │   │       └── Main.class
│       │   ├── P2
│       │   │   ├── FriendshipGraph.class
│       │   │   ├── Person.class
│       │   │   └── Person$Color.class
│       │   └── P3
│       │       ├── BusSegment.class
│       │       ├── Itinerary.class
│       │       ├── RoutePlannerBuilder.class
│       │       ├── RoutePlannerBuilderImplementation.class
│       │       ├── RoutePlanner.class
│       │       ├── RoutePlannerImplementation.class
│       │       ├── RoutePlannerImplementation$Color.class
│       │       ├── Stop.class
│       │       ├── StopTime.class
│       │       ├── TripSegment.class
│       │       └── WaitSegment.class
│       └── test
│           ├── P1
│           │   ├── graph
│           │   │   ├── ConcreteEdgesGraphTest.class
│           │   │   ├── ConcreteVerticesGraphTest.class
│           │   │   ├── GraphInstanceTest.class
│           │   │   └── GraphStaticTest.class
│           │   └── poet
│           │       └── GraphPoetTest.class
│           ├── P2
│           │   └── FriendshipGraphTest.class
│           └── P3
│               └── RoutePlannerTest.class
├── libs
│   └── Lab2-1160300625-1.0.jar
├── reports
│   └── tests
│       └── test
│           ├── classes
│           │   ├── P1.graph.ConcreteEdgesGraphTest.html
│           │   ├── P1.graph.ConcreteVerticesGraphTest.html
│           │   ├── P1.graph.GraphStaticTest.html
│           │   ├── P1.poet.GraphPoetTest.html
│           │   ├── P2.FriendshipGraphTest.html
│           │   └── P3.RoutePlannerTest.html
│           ├── css
│           │   ├── base-style.css
│           │   └── style.css
│           ├── index.html
│           ├── js
│           │   └── report.js
│           └── packages
│               ├── P1.graph.html
│               ├── P1.poet.html
│               ├── P2.html
│               └── P3.html
├── test-results
│   └── test
│       ├── binary
│       │   ├── output.bin
│       │   ├── output.bin.idx
│       │   └── results.bin
│       ├── TEST-P1.graph.ConcreteEdgesGraphTest.xml
│       ├── TEST-P1.graph.ConcreteVerticesGraphTest.xml
│       ├── TEST-P1.graph.GraphStaticTest.xml
│       ├── TEST-P1.poet.GraphPoetTest.xml
│       ├── TEST-P2.FriendshipGraphTest.xml
│       └── TEST-P3.RoutePlannerTest.xml
└── tmp
    ├── compileJava
    ├── compileTestJava
    └── jar
        └── MANIFEST.MF
在 Eclipse 中用 Gradle Builder 替代默认的 Java Builder
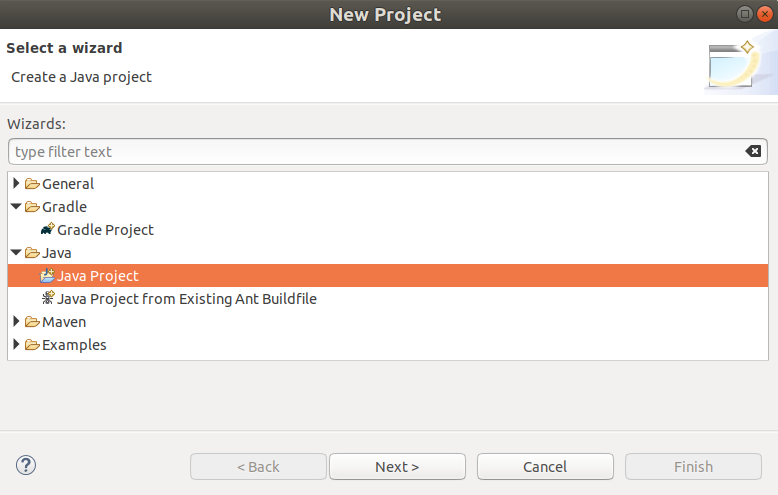
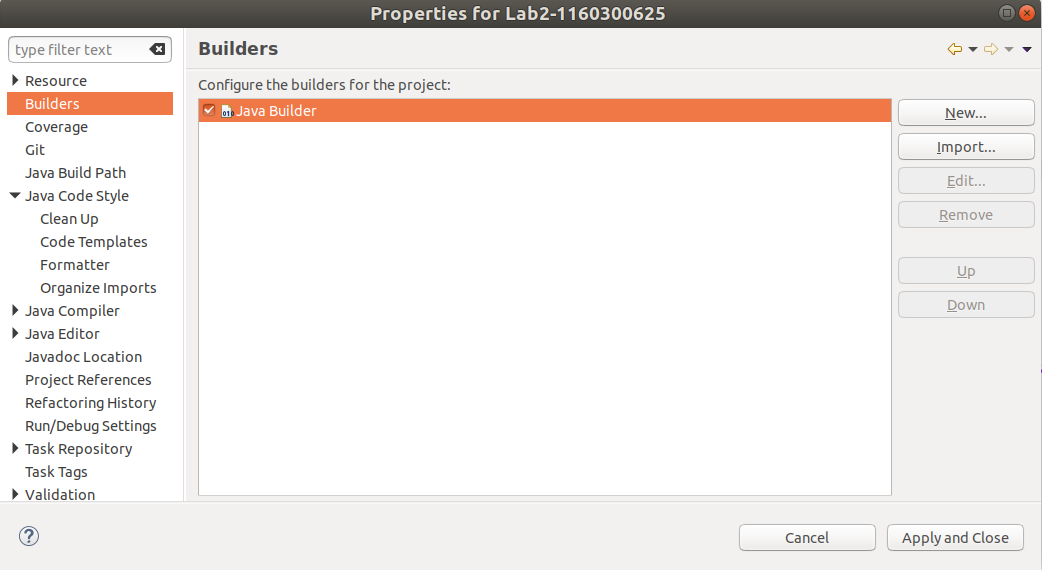
之前创建项目时选的是 Java Project 而不是 Gradle Project ,因此 Eclipse 并不会使用 Gradle Builder 去运行项目,右键点击项目名,在 Properties > Builders 下可以看到现在项目的 Builder 是 Java Builder。
 |
 |
|---|---|
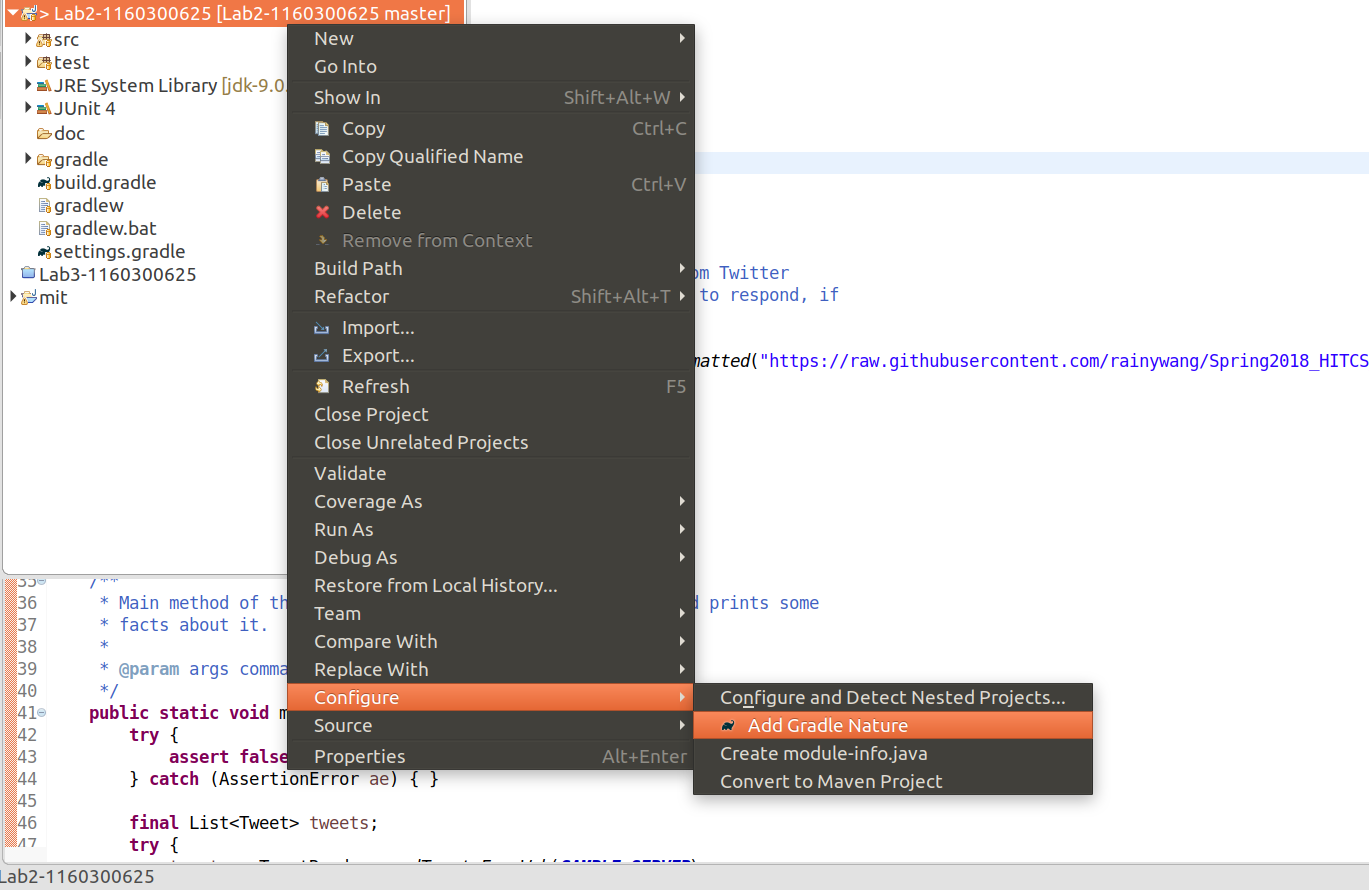
要想把 Java Project 转换为 Gradle Project ,先要在 Help -> Eclipse Market 中搜索并安装Buildship Gradle Intergration 2.0,在最新版的 Eclipse 已经预装了这个插件。然后在项目右键菜单中选择 Configure > Add Gradle Nature。
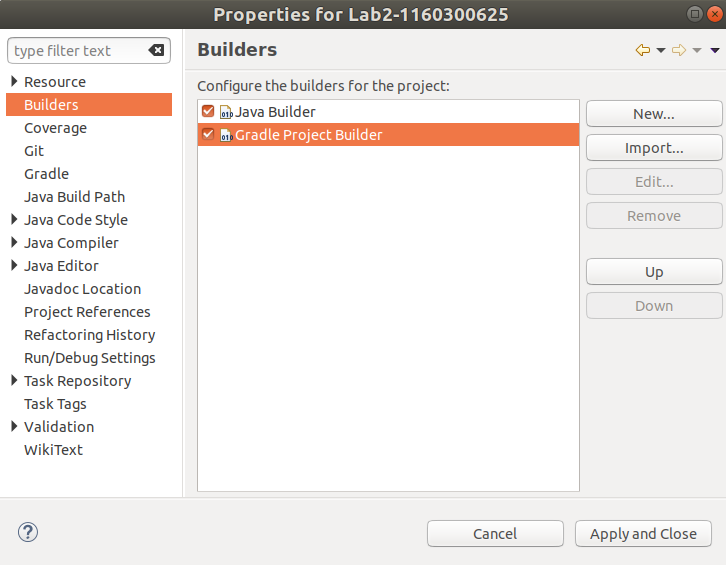
现在再打开 Properties > Builders 将可以看到增加了 Gradle Project Builder ,可以顺手删掉 Java Builder 了,删不掉的话可以直接修改根目录的 .project文件,删除与 Java Builder 相关的定义。
在以后创建新项目的时候可以直接选择 Gradle Project ,这样可以免去后续的烦恼。 Eclipse + Gradle 用起来的感觉跟 Android Studio 一样,有什么依赖直接在 build.gradle中声明即可, Gradle 会自动联网下载依赖。当一个项目在合作者之间传递时,这种方法最简洁,也能避免很多依赖错误。
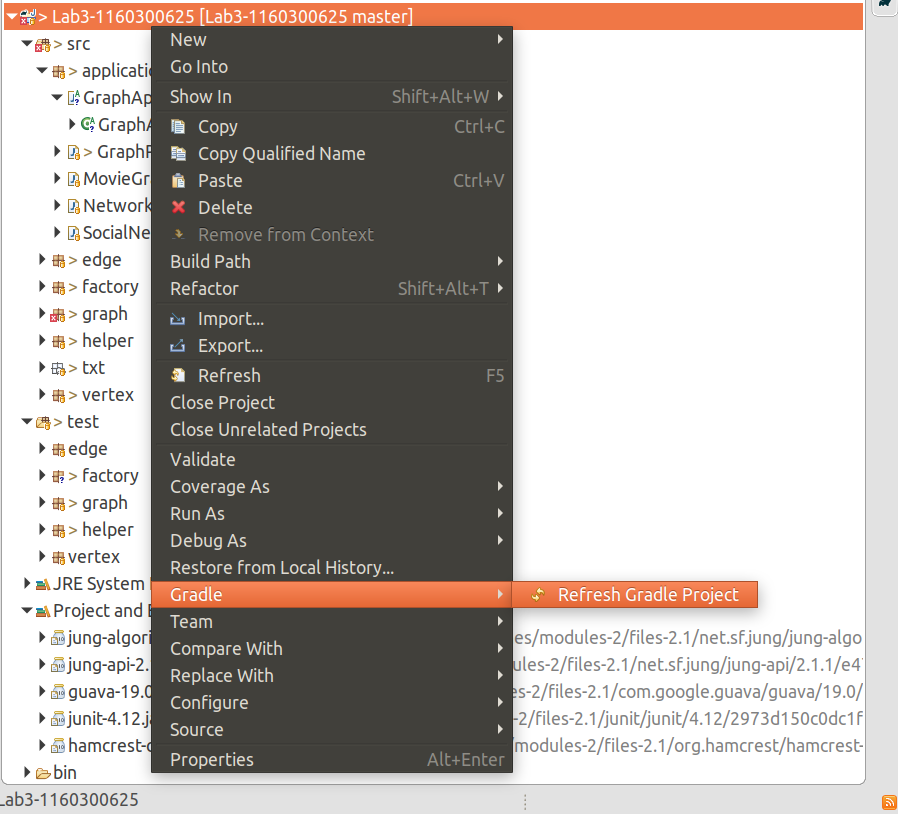
注意:如果在 build.gradle 新加入了依赖(dependencies),应该在 Eclipse 中更新依赖,具体方法:右击项目 -> Gradle -> Refresh Gradle Project,见下图。
最终我的 .project 文件(点击展开/折叠)
<projectDescription>
<name>Lab2-1160300625</name>
<comment></comment>
<projects>
</projects>
<buildSpec>
<buildCommand>
<name>org.eclipse.buildship.core.gradleprojectbuilder</name>
<arguments>
</arguments>
</buildCommand>
</buildSpec>
<natures>
<nature>org.eclipse.jdt.core.javanature</nature>
<nature>org.eclipse.buildship.core.gradleprojectnature</nature>
</natures>
</projectDescription>
.classpath 文件:(点击展开/折叠)
<classpath>
<classpathentry kind="src" output="bin/main" path="src">
<attributes>
<attribute name="gradle_scope" value="main"/>
<attribute name="gradle_used_by_scope" value="main,test"/>
</attributes>
</classpathentry>
<classpathentry kind="src" output="bin/test" path="test">
<attributes>
<attribute name="gradle_scope" value="test"/>
<attribute name="gradle_used_by_scope" value="test"/>
</attributes>
</classpathentry>
<classpathentry kind="con" path="org.eclipse.jdt.launching.JRE_CONTAINER/org.eclipse.jdt.internal.debug.ui.launcher.StandardVMType/JavaSE-1.8/"/>
<classpathentry kind="con" path="org.eclipse.buildship.core.gradleclasspathcontainer"/>
<classpathentry kind="output" path="bin/default"/>
</classpath>
Travis CI
在项目根目录下新建一个.travis.yml文件。10 11
文件内容(点击展开/折叠)
language: java

jdk: oraclejdk8

before_install: chmod +x gradlew

## Travis CI installs dependencies using
# gradle assemble
## You can specify your own script to run to install whatever dependencies
## your project requires
# install: ./install-dependencies.sh

## If your project contains a build.gradle file in the repository root,
## Travis CI builds your project with Gradle:
# gradle check
## If your project also includes the gradlew wrapper script in the
## repository root, Travis CI uses that wrapper instead:
# ./gradlew check
## To use a different script command:
# script: bundle exec thor build
## or:
# script:
# - bundle exec rake build
# - bundle exec rake builddoc

## A peculiarity of dependency caching in Gradle means that to avoid
## uploading the cache after every build you need to add the following
## lines to your .travis.yml
before_cache:
  - rm -f  $HOME/.gradle/caches/modules-2/modules-2.lock
  - rm -fr $HOME/.gradle/caches/*/plugin-resolution/
cache:
  directories:
    - $HOME/.gradle/caches/
    - $HOME/.gradle/wrapper/
-
languge: java使用 java 语言
-
jdk: oraclejdk8使用
oraclejdk8进行测试。可以定义多个不同的jdk版本。 -
before_install: chmod +x gradlew由于在
script阶段,默认运行./gradlew check。如果不加入这句命令, Travis-CI 会出现下面的错误:$ ./gradlew assemble
/home/travis/.travis/job_stages: line 236: ./gradlew: Permission denied
The command "eval ./gradlew assemble " failed. Retrying, 2 of 3.
/home/travis/.travis/job_stages: line 236: ./gradlew: Permission denied
The command "eval ./gradlew assemble " failed. Retrying, 3 of 3.
/home/travis/.travis/job_stages: line 236: ./gradlew: Permission denied
The command "eval ./gradlew assemble " failed 3 times.
The command "./gradlew assemble" failed and exited with 126 during .
Your build has been stopped. -
install安装项目所需的依赖。
-
script运行 build 脚本。
在 Gradle 部分,我为了免去下载环节,修改了
gradle/wrapper/gradle-wrapper.properties,在这里要改回来:distributionUrl=https\://services.gradle.org/distributions/gradle-4.6-bin.zip
-
before_cache清除缓存。
-
cache缓存数据,加速下次 build 。
更详细的说明参见 The Build Lifecycle。
总结
- 通过本地 Gradle build,生成可复用的 jar 文件,并进行测试。
- 配置 Travis CI ,每次 push 到 github 时都会自动进行 build 。
参考资料
- Gradle | Releases
- Upgrade to Groovy 2.4.12 for full Java 9 compatibility · Issue #2995 · gradle/gradle · GitHub
- Java 9 Migration Guide: The Seven Most Common Challenges - blog@CodeFX
- command line arguments - What’s the difference between --add-exports and --add-opens in Java 9? - Stack Overflow
- JEP 261: Module System
- Creating New Gradle Builds
- Getting Started · Building Java Projects with Gradle
- Java Quickstart - Gradle User Manual
- The Java Plugin - Gradle User Manual
- Customizing the Build - Travis CI
- asciidoctor-gradle-examples/.travis.yml at master · asciidoctor/asciidoctor-gradle-examples · GitHub